>>
30-MINUTE MEALS! Get the email series now →


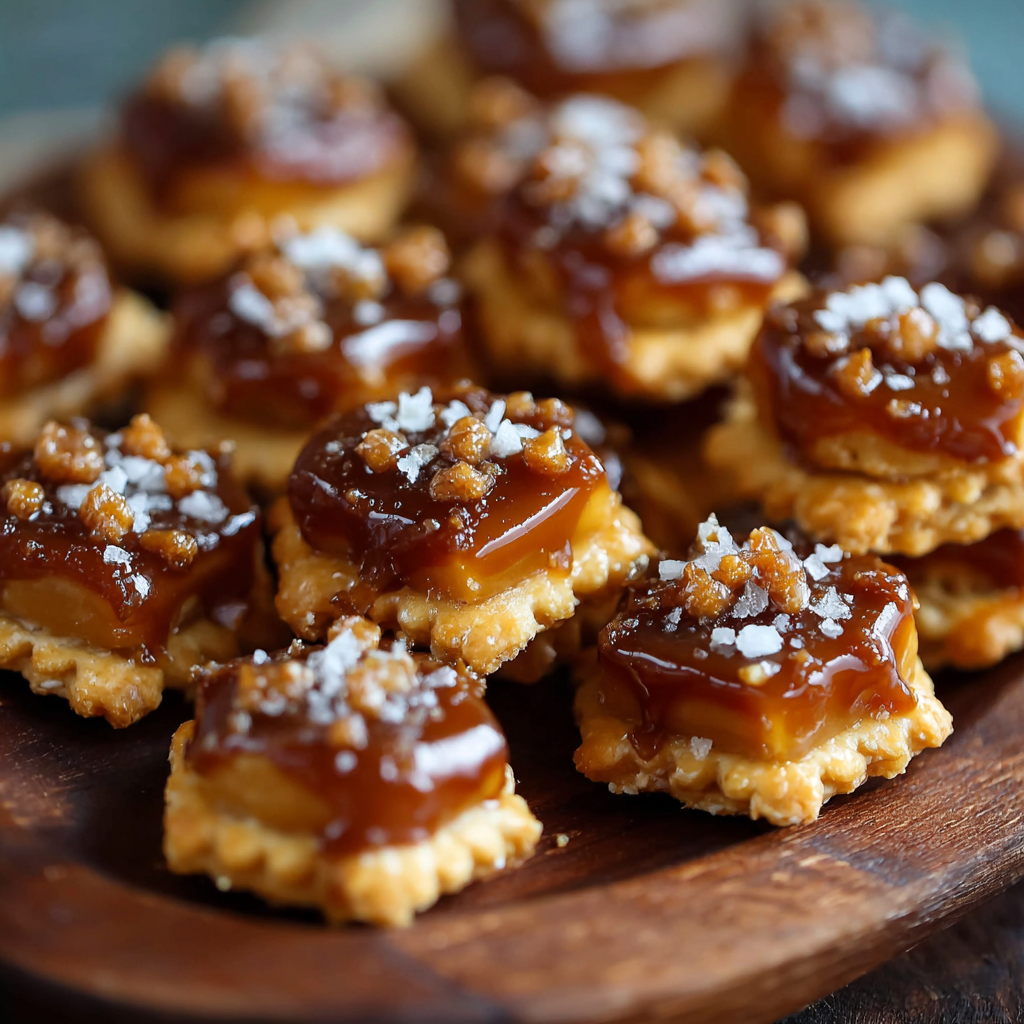
Sweet, salty, and irresistibly crunchy oyster cracker clusters glazed in buttery caramel—ready in under 30 minutes and perfect for sharing.
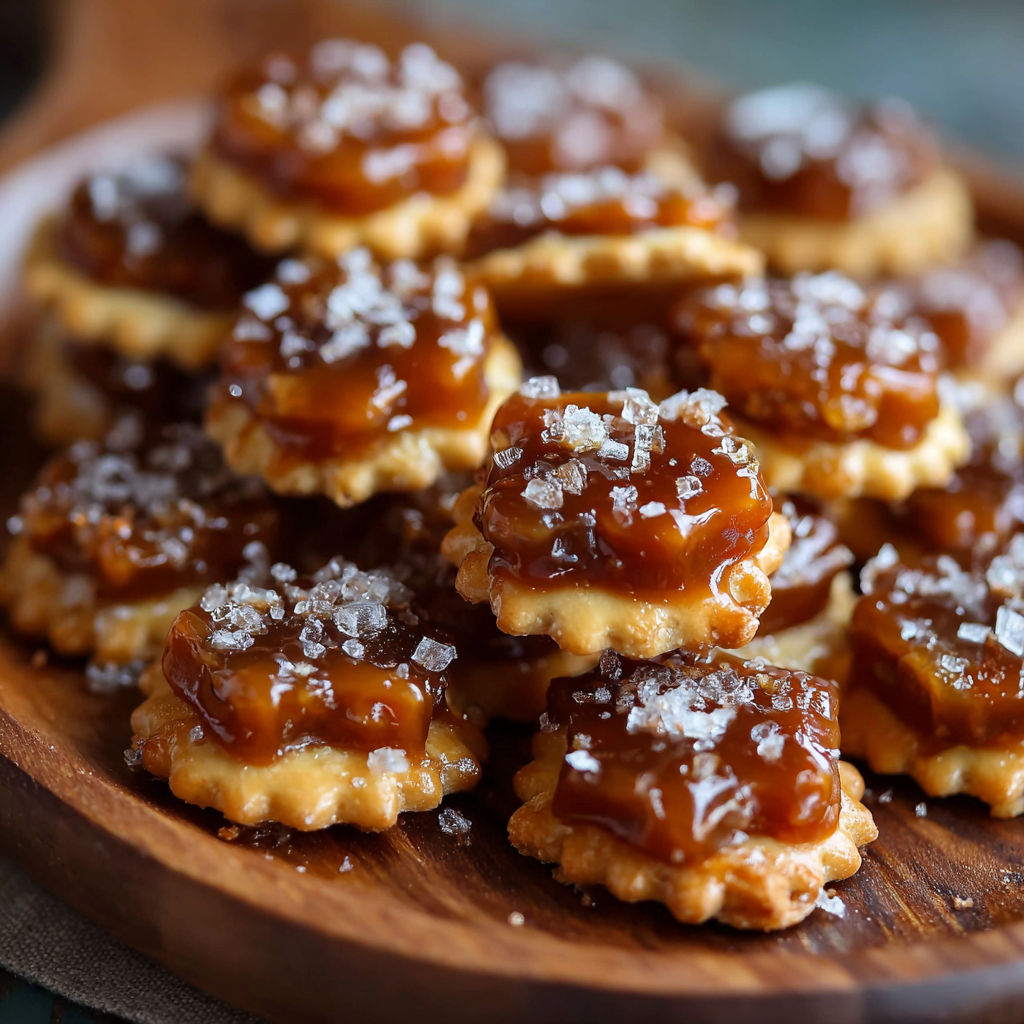
This salted caramel cracker bites recipe is a quick, crowd-pleasing sweet that I first made one chilly November evening when I wanted something to bring to a neighbor gathering. I was drawn to the simplicity: just a handful of pantry staples transformed into crunchy, caramel-coated clusters that everyone loved. The caramel is buttery and glossy, the oyster crackers add the perfect porous crunch, and the finishing sprinkle of salt makes every bite addictive. Over time these bites became my go-to last-minute dessert for potlucks, holidays, and movie nights.
I discovered how forgiving this mix is the first time I made it: if the caramel thickened a little too much, I simply warmed it briefly and the sauce loosened. If the crackers looked slightly overbrowned, the clusters still tasted amazing once fully cooled. The contrast between the sweet brown sugar caramel and the tiny pop of salt creates a layered flavor experience—caramel sweetness, toasted butter notes, and a slow salty finish. This recipe is perfect for when you need a fast dessert, want to use pantry staples, or crave something both crunchy and creamy that stores well for several days.
From my first batch to the version I make now, I learned to keep a close eye on the caramel during that brief boil. My family’s reaction was immediate the first time—my partner came back for seconds, and a neighbor texted the next day asking for the recipe. That encouraging feedback convinced me to standardize the timing and add a small pinch of extra salt at the end, which became a signature touch people ask for whenever I bring these to gatherings.
My favorite aspect of this recipe is how forgiving it is. Even when timing wasn’t perfect, the result still satisfied a sweet craving and brought people together. I once brought these to a neighborhood block party and they disappeared within 20 minutes; someone later described them as the perfect balance of sweet and salty, which made me realize that small adjustments like the choice of butter or the size of the salt flakes make a big difference in the final mouthfeel. That feedback led me to refine the salt amount and to always recommend cooling fully before handling so clusters hold their shape.

To maintain crispness, cool the clusters fully on the baking sheet until the caramel is hard to the touch, then transfer to an airtight container lined with parchment. Store at room temperature away from direct sunlight and heat; avoid refrigeration unless your home is very warm, because chilling can make the caramel stiff and less pleasant to bite. For longer storage, freeze in a tightly sealed container for up to 3 months; thaw at room temperature for about 20 minutes before serving. If the clusters stick together after storage, a quick 5-minute low oven heat at 300 degrees Fahrenheit will help separate them and refresh their crunch.
If you need to adapt the recipe, there are easy swaps. Use vegan stick butter or coconut oil to make a dairy-free version, but expect a slight change in flavor and texture—coconut oil will lend a subtle coconut note and a slightly softer set. For a gluten-free option, swap the oyster crackers for a certified gluten-free cracker of similar size; the caramel behavior remains the same but the bite will vary based on the cracker structure. Brown sugar can be substituted with dark brown sugar for a deeper molasses flavor, or with coconut sugar for a lower glycemic index alternative, though the color and taste will shift slightly.
Serve these clusters on a small platter with a few bowls of complementary nibbles like roasted nuts, dried fruit, or chocolate-covered espresso beans for contrast. They pair beautifully with coffee or a glass of cold milk and make a charming edible gift when placed in a clear jar with a ribbon. For a dessert board, scatter clusters between sliced apples and soft cheeses—the sweet-salty combination enhances both fruity and creamy elements on the board. Garnish with an extra pinch of flaky sea salt right before serving for a gourmet finish.
Sweet-and-salty confections have long been a favorite in American home baking, where simple pantry transforms into nostalgic treats. Using oyster crackers as a crunchy base is a creative twist on classic brittle-style sweets and reflects the do-it-yourself attitude of community potlucks and holiday gatherings. This type of treat speaks to the American tradition of turning humble ingredients into shareable delights—easy to scale and beloved across generations for its straightforward technique and comforting flavors.
Adjust the spice profile for the season: add 1/4 teaspoon ground ginger or nutmeg in fall and winter for warm, festive notes, or stir in a teaspoon of finely grated orange zest in spring for brightness. For holidays, fold in chopped toasted pecans or mini chocolate chips immediately after pouring the caramel to create seasonal variations. For summer gatherings, keep the salt light and add a sprinkle of lemon zest to cut the richness and add a refreshing touch.
To prepare ahead, make several batches and store them in separate airtight containers for the week—label containers with the date so you use the oldest batch first. Portion clusters into small snack bags for grab-and-go treats or to pack in lunchboxes. If you plan to transport them, place parchment between layers to prevent sticking and use a rigid container to avoid crushing. When gifting, include a small note with reheating instructions: 5 minutes at 300 degrees Fahrenheit refreshes the crunch without melting the caramel.
These salted caramel cracker bites are simple, flexible, and reliably delicious. Whether you make a single batch for an evening snack or a dozen jars as holiday gifts, they bring warmth and crunchy satisfaction to any occasion. I hope this version becomes a favorite in your kitchen too—tweak the salt and spice to suit your taste, and enjoy sharing them with friends and family.
Always watch the caramel closely during the 2 to 3-minute boil; it can go from perfect to burnt very quickly.
Cool the clusters completely on the baking sheet before breaking them apart so they set firmly and hold their shape.
Use unsalted butter so you can control the final salt level; add flaky sea salt at the end for texture.
If the caramel thickens before you finish tossing, warm it briefly over low heat to loosen it for even coating.
Line the storage container with parchment to prevent sticking and to keep the clusters crisp longer.
This nourishing salted caramel cracker bites recipe is sure to be a staple in your kitchen. Enjoy every moist, high protein slice — it is perfect for breakfast or as a wholesome snack any time.
This Salted Caramel Cracker Bites recipe makes perfectly juicy, tender, and flavorful steak every time! Serve with potatoes and a side salad for an unforgettable dinner in under 30 minutes.
Preheat oven to 350 degrees Fahrenheit and line a rimmed baking sheet with parchment paper. Spread the 9-ounce package of oyster crackers in a single even layer across the sheet to ensure even caramel coverage.
In a medium heavy-bottomed saucepan over medium heat, melt 1 cup (2 sticks) unsalted butter. Stir in 1 cup packed light brown sugar, 2 teaspoons vanilla extract, and 1/2 teaspoon ground cinnamon until the sugar is fully moistened and the mixture is uniform.
Bring the mixture to a gentle boil, stirring constantly. Allow to boil for 2 to 3 minutes until the caramel thickens slightly and becomes glossy. Stir continuously to prevent burning and achieve a smooth sauce.
Remove from heat and immediately pour the hot caramel evenly over the layered crackers. Use a heatproof spatula to gently toss and fold the crackers so they are evenly coated. Sprinkle 1 teaspoon fine sea salt over the mixture.
Bake in the preheated 350 degree Fahrenheit oven for 7 to 9 minutes, watching closely. The caramel should bubble and become shiny; remove when bubbling steadily and slightly lighter in color to avoid burning.
Allow the coated crackers to cool completely on the baking sheet so the caramel sets. Once cooled, break into clusters and store in an airtight container at room temperature for up to 5 days or freeze for longer storage.
Last Step: Please leave a rating and comment letting us know how you liked this recipe! This helps our business to thrive and continue providing free, high-quality recipes for you.
Leave a comment & rating below or tag
@kitchenfunwithmy3sons on social media!
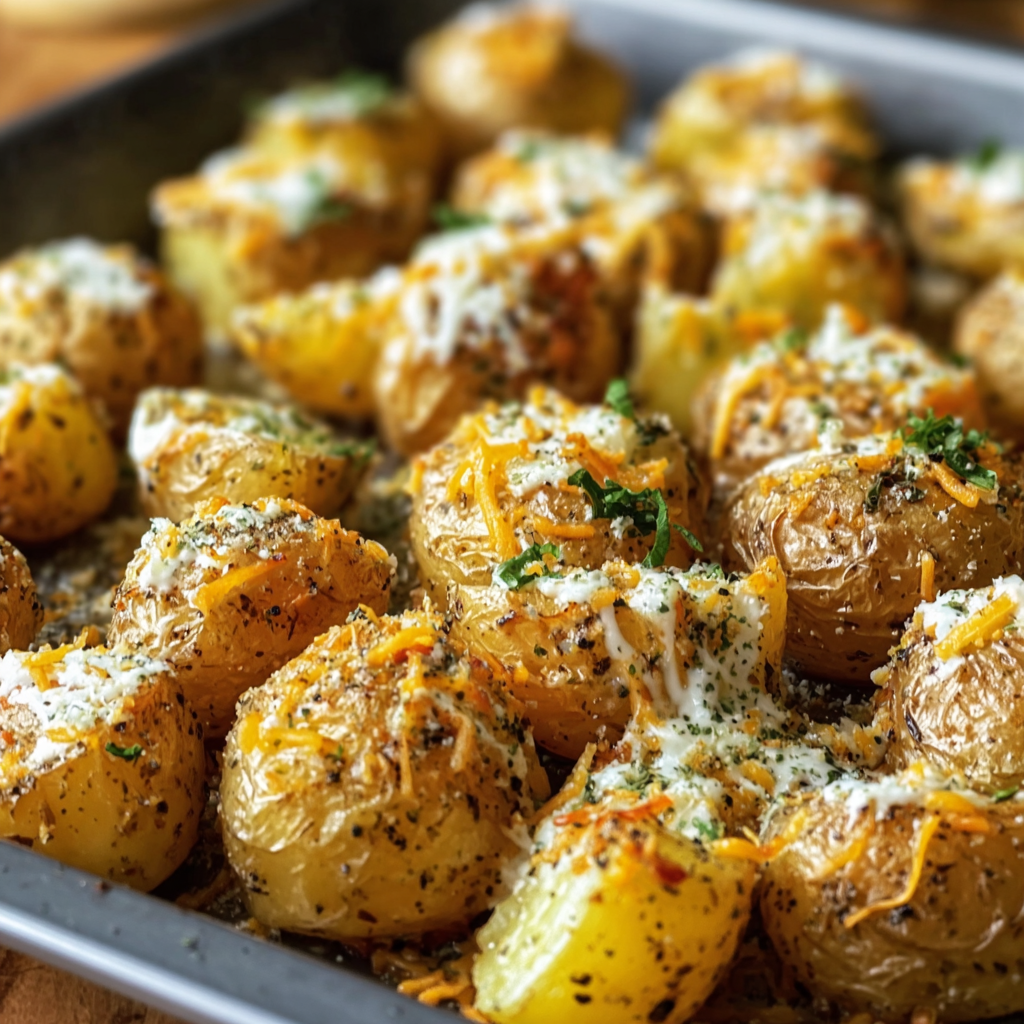
Golden baby potatoes roasted until crisp and tossed in ranch seasoning, Parmesan, and melty cheddar — an easy, crowd-pleasing side that’s ready in under an hour.

A fizzy blend of strawberry syrup, fresh lime, and lemon-lime soda, served chilled with vibrant garnishes for the ultimate refreshing beverage — boozy or not.
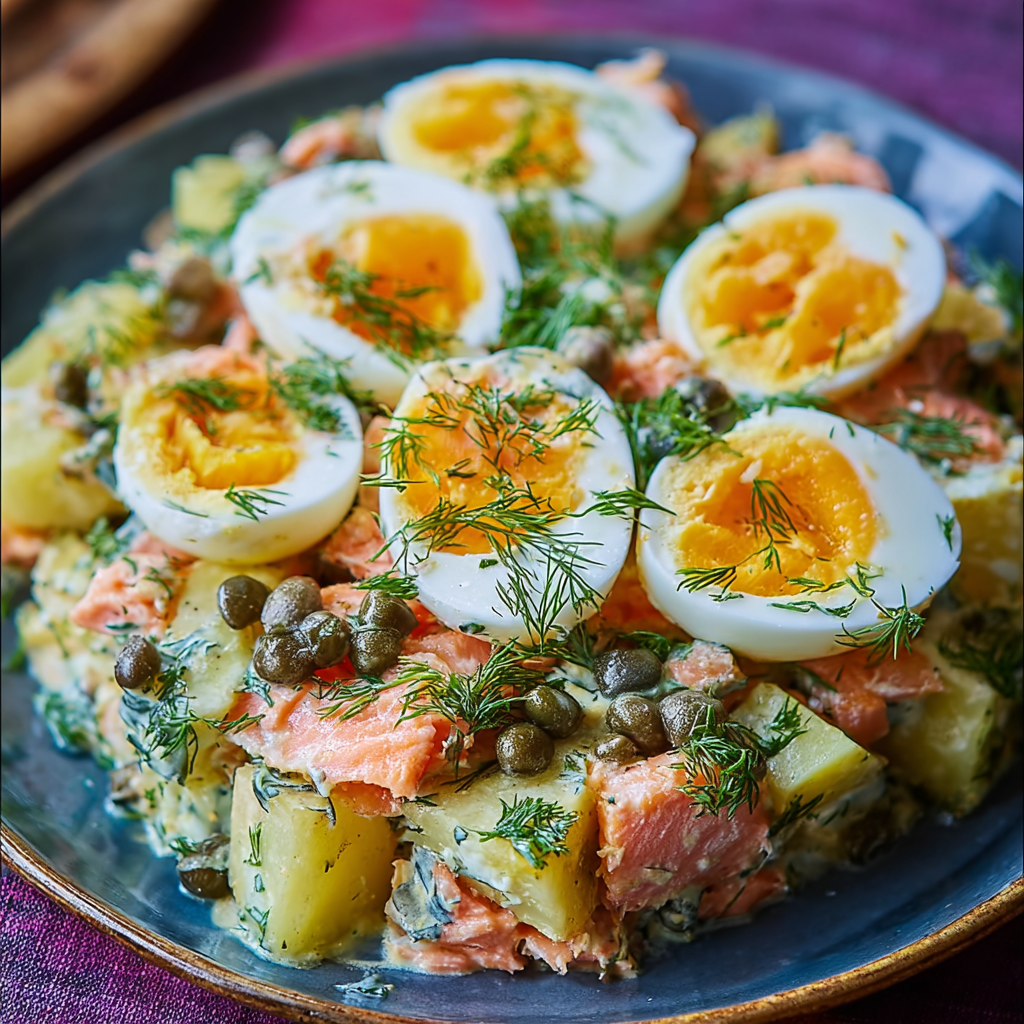
A satisfying Russian-style salad combining seared salmon, tender baby potatoes, soft-boiled eggs, dill, capers and gherkins — perfect for light lunches or a weekend gathering.
Leave a comment & rating below or tag @kitchenfunwithmysons on social media!
Enjoyed this recipe? Share it with friends and family, and don't forget to leave a review!
This recipe looks amazing! Can't wait to try it.
Comments are stored locally in your browser. Server comments are displayed alongside your local comments.

Join to receive our email series which contains a round-up of some of our quick and easy family favorite recipes.