>>
30-MINUTE MEALS! Get the email series now →


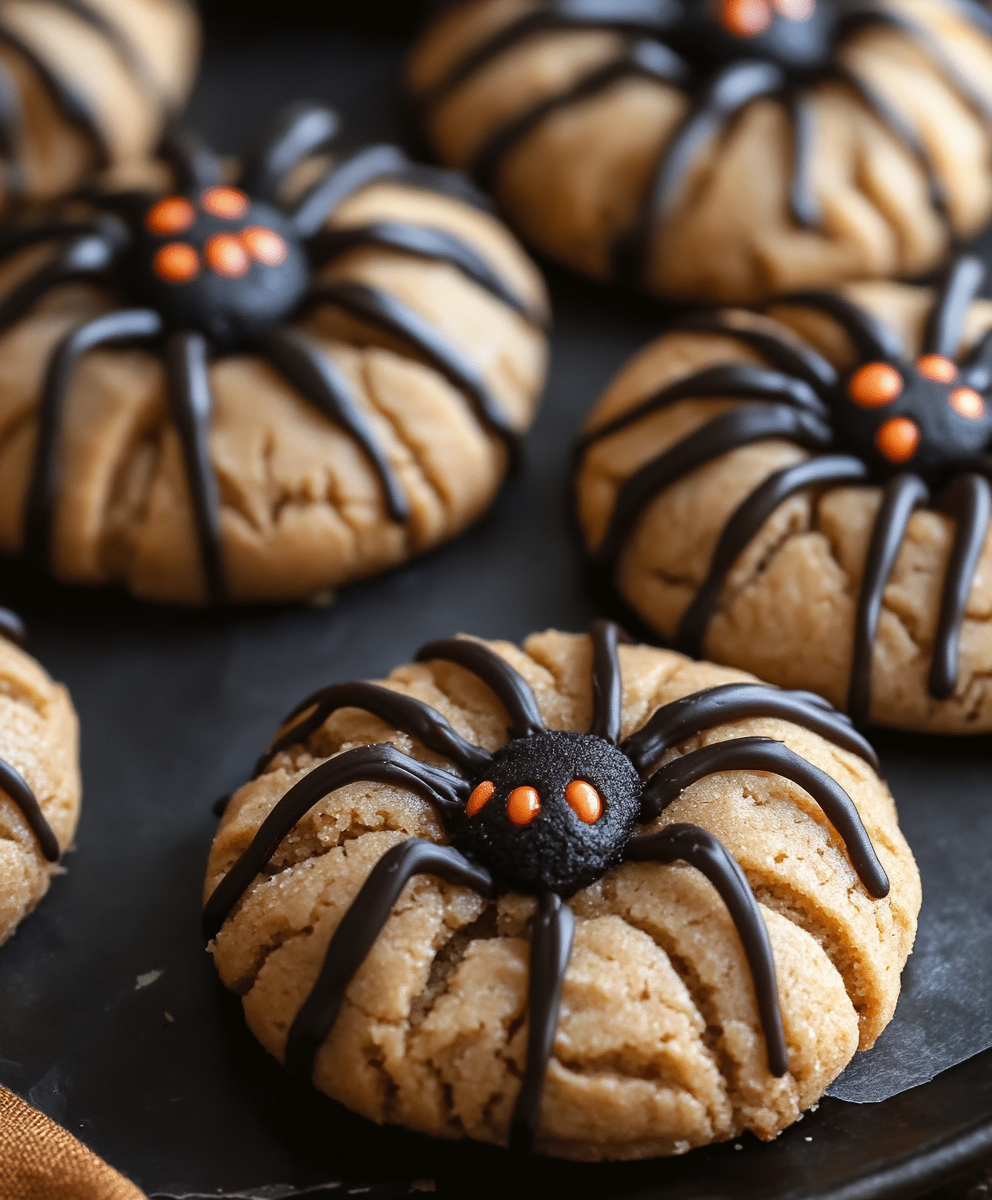
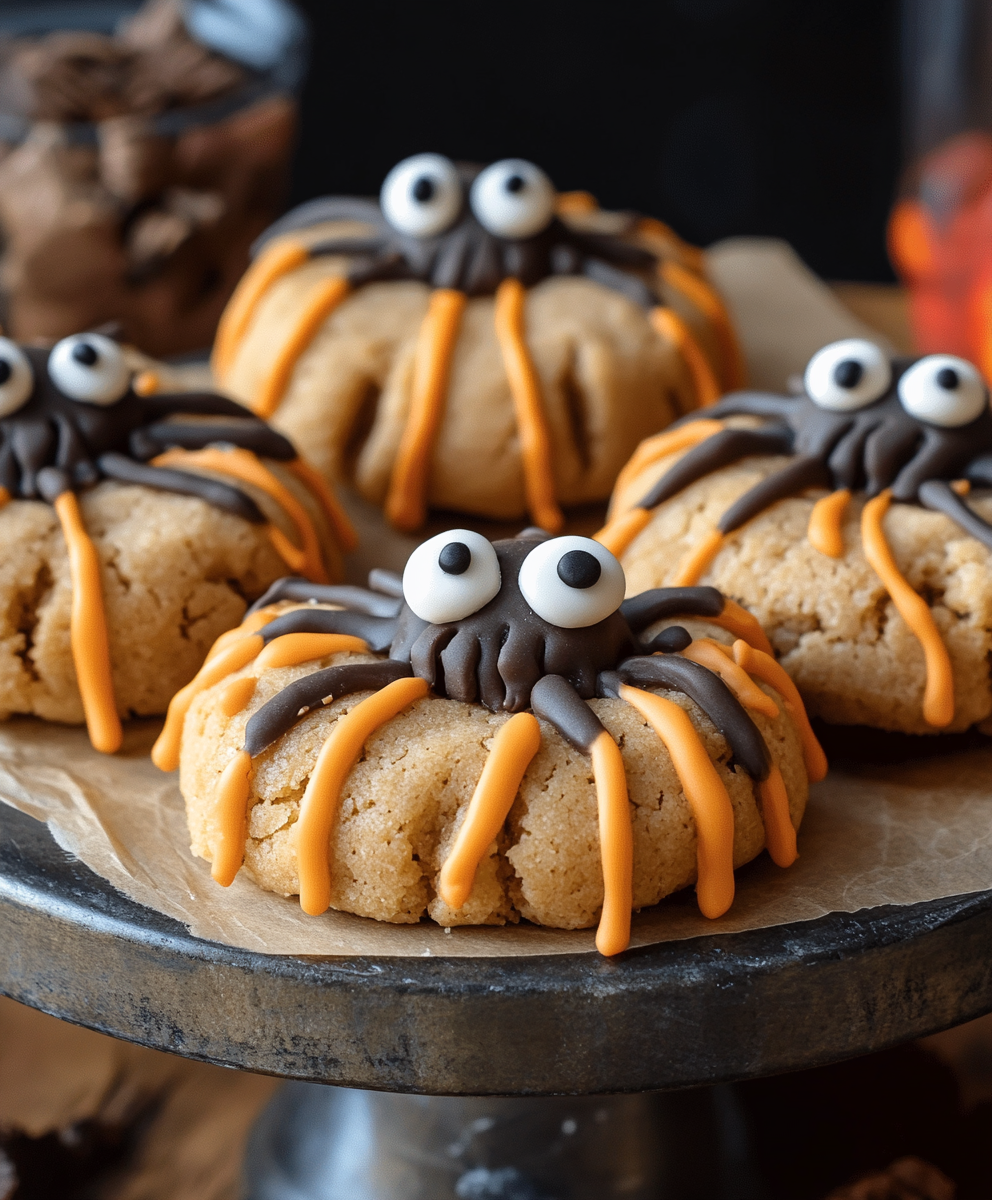
Crunchy-sugary peanut butter cookies topped with a chocolate body, candy eyes, and piped chocolate legs — a playful and easy treat kids can help make for Halloween.

When I make these I always chill the chocolates before slicing — it’s a small step that makes a big difference. At the last potluck a friend asked for the recipe because the texture and presentation were so memorable; that’s when I realized how much a simple decoration can elevate a familiar cookie into something special.
My favorite thing about these is how much fun they make the decorating process. One year my son made an entire army of tiny spiders and left them under the Halloween tree as a surprise. The simple steps and fast assembly make these ideal for classroom parties and bake sales because they keep well and look great on trays.
Store cooled cookies in a single layer or with parchment between layers in an airtight container at room temperature for up to 4 days; refrigeration will stiffen the frosting and change the cookie texture, so avoid it unless your kitchen is very warm. To freeze, arrange cookies in a single layer on a baking sheet and freeze until solid, then transfer to a zip-top freezer bag with parchment between layers for up to 3 months. Thaw at room temperature for 30 to 60 minutes before serving so the chocolate and frosting soften and the texture returns to its intended state.
If peanuts are a concern, substitute the peanut butter with almond or sunflower seed butter measured 1:1; sunflower seed butter is a great allergy-friendly alternative that still yields a similar texture. Use mini peanut butter cups for the spider body if you prefer a slightly less expensive option than chocolate truffles. For dairy-free versions, choose nondairy chocolate truffles and a vegan frosting; be aware that texture and flavor will shift slightly. To make gluten-free, replace all-purpose flour with a 1:1 gluten-free flour blend that contains xanthan gum for comparable structure.
Serve these on a Halloween platter surrounded by toasted pumpkin seeds or candy corn for a festive spread. They pair well with a cold glass of milk or a warm mug of spiced hot chocolate. For a party, arrange them on a tiered cake stand with small decorative bats or use cupcake liners for individual portions. Garnish with a touch of red gel near the eyes to create a creepier look if serving to an enthusiastic crowd.
Peanut butter cookies are an American classic with roots in 20th-century home baking, prized for their simple, pantry-friendly ingredients and robust peanut flavor. Decorating cookies into festive shapes and characters has become a universal party tradition; turning a round cookie into a spider taps into Halloween’s playful transformation of food into whimsical or spooky objects. This version blends classic home-baked comfort with modern, easy-to-find candy decorations that make seasonal baking accessible to busy families.
In the fall, fold in 1/2 teaspoon ground cinnamon to the dough for a warm spice note. For winter gatherings, swap the spider bodies for peppermint truffle halves and decorate with green and red candy eyes for a cheeky holiday creature. In warmer months, use glossy ganache instead of prepared frosting so the legs set firmer in humid climates — just allow extra chilling time before transport.
For easy party prep, bake two days ahead and chill the cookies in an airtight container. On the day of serving, slice chilled chocolates and assemble bodies and eyes; piping takes only 10 to 15 minutes for a dozen cookies. Use disposable piping bags to speed cleanup, and keep a tray of finished cookies covered with a clean kitchen towel to avoid dust while you finish other items.
These peanut butter spider cookies are a joyful combination of nostalgic flavor and playful presentation. Whether you’re making them with kids, for a school event, or to surprise neighbors, they deliver delicious texture and memorable visuals. Give them a try and feel free to make small swaps — the basic method is forgiving and always rewarding. Happy baking!
Chill chocolate centers before slicing to get a clean cut and avoid crumbling.
Roll dough balls in granulated sugar to create a slightly crisp outer shell that contrasts with the soft interior.
Pipe thin leg lines and let the frosting set at room temperature for about 30 minutes before stacking or transporting.
This nourishing peanut butter spider cookies recipe is sure to be a staple in your kitchen. Enjoy every moist, high protein slice — it is perfect for breakfast or as a wholesome snack any time.
Yes. Chill the chocolates before cutting; warm centers will bend and crack. Use a sharp serrated knife and a quick, decisive motion.
Store at room temperature in an airtight container for up to 4 days; freeze up to 3 months with parchment layers.
This Peanut Butter Spider Cookies recipe makes perfectly juicy, tender, and flavorful steak every time! Serve with potatoes and a side salad for an unforgettable dinner in under 30 minutes.
Preheat oven to 375 degrees F (190 degrees C). Line baking sheets with parchment paper and arrange tools for decorating close by so assembly is efficient after baking.
Beat shortening, peanut butter, brown sugar, and 1/2 cup granulated sugar until smooth; beat in the beaten egg, then stir in milk and vanilla until uniform.
Whisk flour, baking soda, and salt; add to the wet mixture and stir until a soft dough forms. If dough is sticky, chill briefly; if dry, add up to 1 teaspoon milk.
Form 48 equal dough balls (about 1 tablespoon each), roll in 1/4 cup granulated sugar, place 2 inches apart on sheets, and bake 10 to 12 minutes until edges are golden. Press a dimple into each cookie while warm.
Cool cookies on the sheet 10 minutes then transfer to a rack. Halve chilled truffles and set a half on each cookie. Use frosting to adhere two candy eyes and pipe four legs on each side to form a spider.
Last Step: Please leave a rating and comment letting us know how you liked this recipe! This helps our business to thrive and continue providing free, high-quality recipes for you.
Leave a comment & rating below or tag
@kitchenfunwithmy3sons on social media!
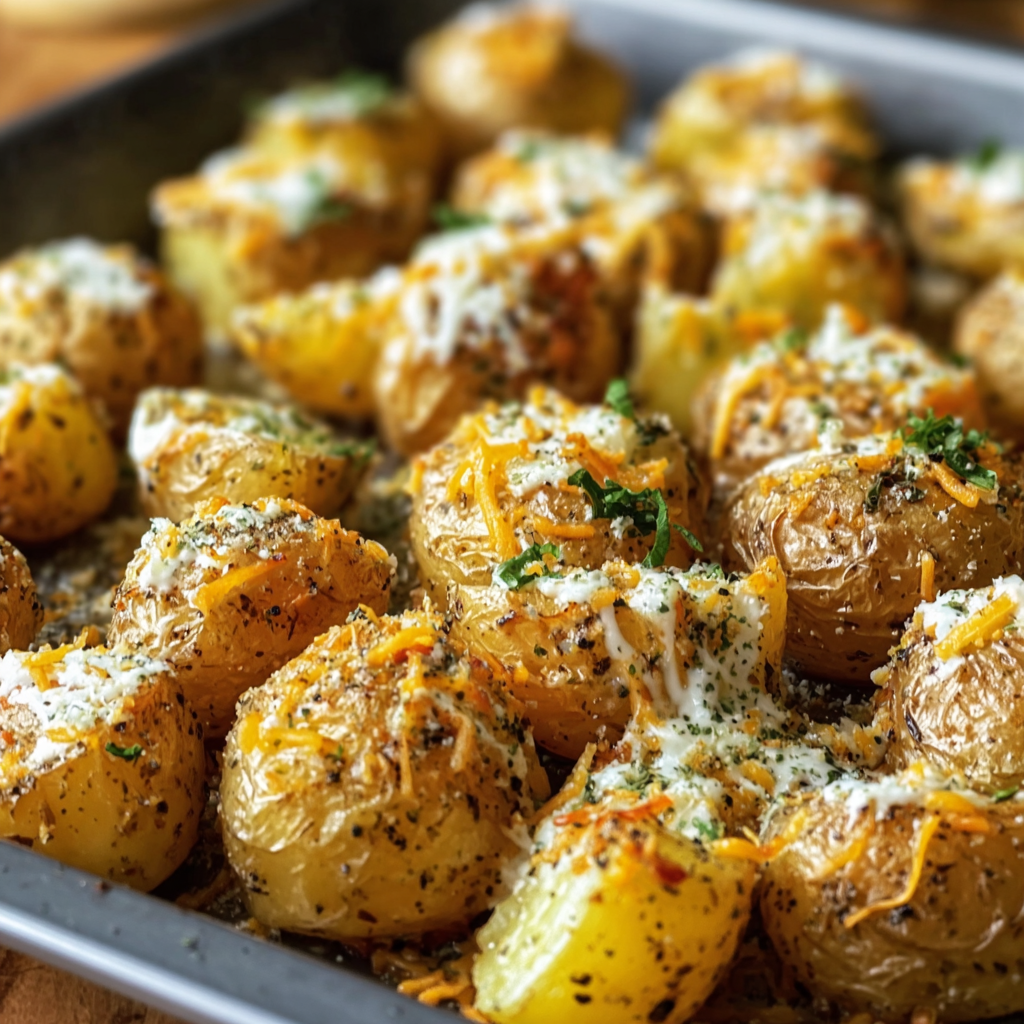
Golden baby potatoes roasted until crisp and tossed in ranch seasoning, Parmesan, and melty cheddar — an easy, crowd-pleasing side that’s ready in under an hour.

A fizzy blend of strawberry syrup, fresh lime, and lemon-lime soda, served chilled with vibrant garnishes for the ultimate refreshing beverage — boozy or not.
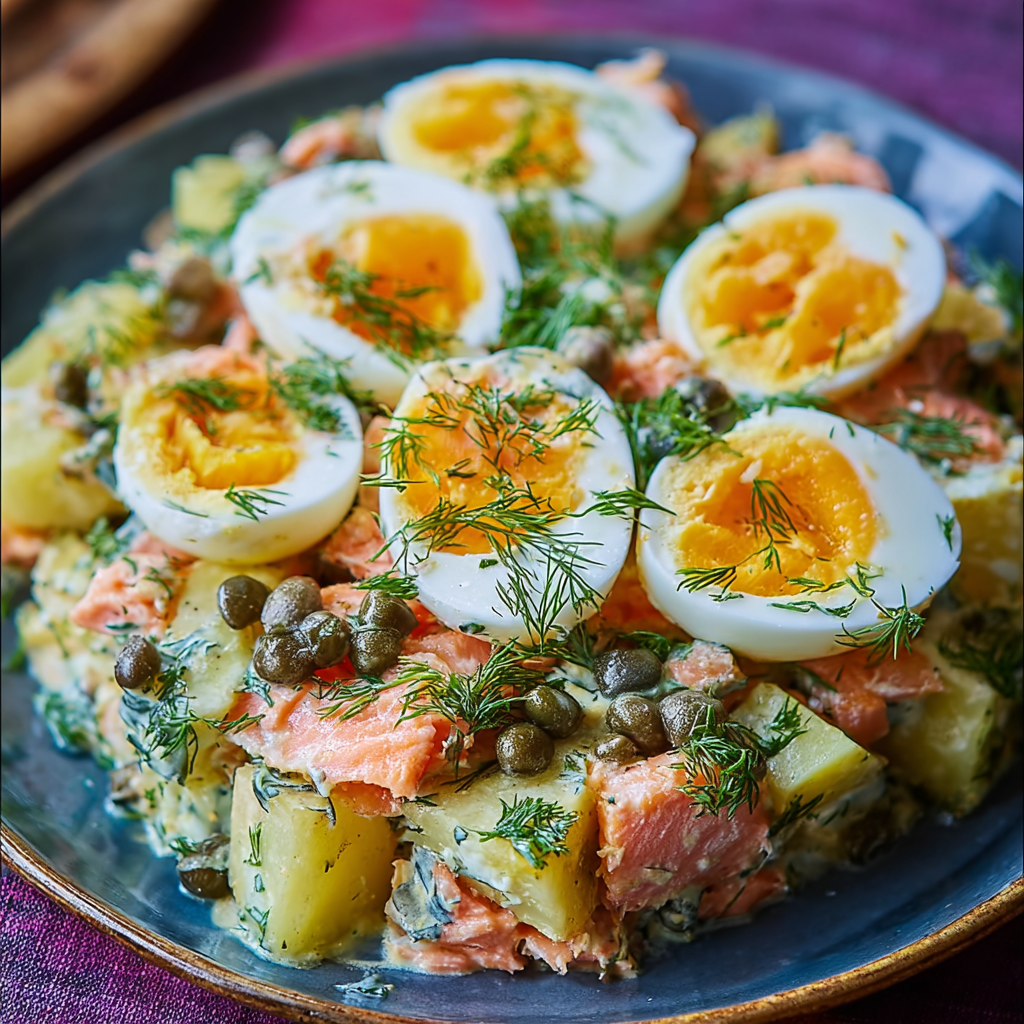
A satisfying Russian-style salad combining seared salmon, tender baby potatoes, soft-boiled eggs, dill, capers and gherkins — perfect for light lunches or a weekend gathering.
Leave a comment & rating below or tag @kitchenfunwithmysons on social media!
Enjoyed this recipe? Share it with friends and family, and don't forget to leave a review!
This recipe looks amazing! Can't wait to try it.
Comments are stored locally in your browser. Server comments are displayed alongside your local comments.

Join to receive our email series which contains a round-up of some of our quick and easy family favorite recipes.